scdf 설치에 앞서 windows 에 istio 까지 기본 설정해본다
k8s
k8s는 도커데스크탑으로 일단 해결. 간단스👌해서 따로 설치 방법은 적지 않는다.

helm
헬름은 환경변수로 설정해주면 끝이다.
https://github.com/helm/helm/releases 로 이동해서 최신 릴리즈의 windows amd 64 binary를 다운받는다
Releases · helm/helm
The Kubernetes Package Manager. Contribute to helm/helm development by creating an account on GitHub.
github.com

그리고 다운 받은 경로를 환경변수에 등록한다.

굳👍
istio
istio는 operator로 설치한다. 뭐든지 간단한게 좋다.
먼저 istioctl 부터 설치한다. helm과 마찬가지로 binary로 설치하고 환경변수로 등록한다.
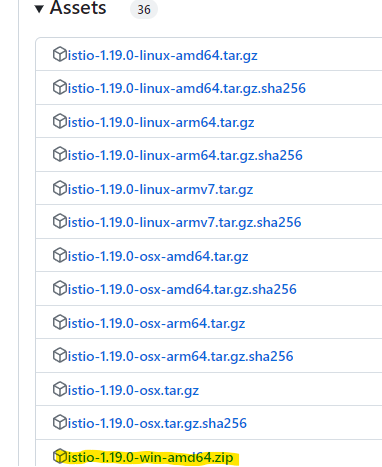
Istio의 가이드대로 https://github.com/istio/istio/releases/tag/1.19.0 로 이동해서 istio wind amd64 버전을 다운받아 압축을 해제하고 해당 경로를 환경변수로 등록한다.
Release Istio 1.19.0 · istio/istio
Artifacts Release Notes
github.com
터미널에서 테스트

istio 가이드대로 터미널에서 istioctl operator init 을 실행하여 설치. (https://istio.io/latest/docs/setup/install/operator/ 참조)
Istio Operator Install
Instructions to install Istio in a Kubernetes cluster using the Istio operator.
istio.io
gateway-vs.yaml 을 아래 내용으로 만들어놓고 apply 한다. (2부에서 버츄얼서비스를 붙이려고 이름을 scdf로 했다)
apiVersion: networking.istio.io/v1beta1
kind: Gateway
metadata:
  name: scdf-gateway
  namespace: default
spec:
  selector:
    istio: ingressgateway
  servers:
  - hosts:
    - '*'
    port:
      name: http
      number: 8080
      protocol: HTTP
이제 scdf 를 설치해보자
https://dataflow.spring.io/docs/installation/kubernetes/helm/
Documentation | Spring Cloud Data Flow
dataflow.spring.io
공식 가이드로 이동해서 설치 방법을 보니 미리 준비한 helm 설치방법이 보인다. 따라하자.
이름을 좀 바꾼다는게 나도 모르게 그대로 my-release로 설치해버렸다. helm unsintall 도 귀찮아서 my-release로 한다.
helm install my-release oci://registry-1.docker.io/bitnamicharts/spring-cloud-dataflow※ 간혹 server와 skipper 가 pending 되는 현상이 보일수 있다. 이런 저런 방법으로 scdf를 몇번 설치를 해봤을때 공통된 원인은 SCDF 설치하면 기본으로 파드가 4개는 생성되는데 SCDF Server, SCDF Skipper, DB, MQ 또는 Kafka이다. DB와 MQ/Kafka에서 볼륨을 필요로 하는데, 대부분 pending 원인은 DB와 MQ의 PVC에 바인드 할 PV가 생성되지 않은 경우이니 이럴땐 PV를 생성해준다.
설치가 잘되었나 확인해본다.
PS D:\> kubectl get po,svc
NAME                                                            READY   STATUS    RESTARTS       AGE
pod/my-release-mariadb-0                                        2/2     Running   8 (30m ago)    7d8h
pod/my-release-rabbitmq-0                                       2/2     Running   8 (30m ago)    7d8h
pod/my-release-spring-cloud-dataflow-server-599bbd6bcb-ljdkv    2/2     Running   13 (29m ago)   7d8h
pod/my-release-spring-cloud-dataflow-skipper-75c47dc7b8-ph9gj   2/2     Running   13 (29m ago)   7d8h

NAME                                               TYPE        CLUSTER-IP       EXTERNAL-IP   PORT(S)                                 AGE
service/details                                    ClusterIP   10.101.222.125   <none>        9080/TCP                                34d
service/kubernetes                                 ClusterIP   10.96.0.1        <none>        443/TCP                                 54d
service/my-release-mariadb                         ClusterIP   10.111.37.122    <none>        3306/TCP                                7d8h
service/my-release-rabbitmq                        ClusterIP   10.102.132.254   <none>        5672/TCP,4369/TCP,25672/TCP,15672/TCP   7d8h
service/my-release-rabbitmq-headless               ClusterIP   None             <none>        4369/TCP,5672/TCP,25672/TCP,15672/TCP   7d8h
service/my-release-spring-cloud-dataflow-server    ClusterIP   10.100.78.17     <none>        8080/TCP                                7d8h
service/my-release-spring-cloud-dataflow-skipper   ClusterIP   10.97.133.154    <none>        80/TCP                                  7d8h
이제 scdf 버츄얼서비스를 생성한다. scdf-vs.yaml을 아래 내용으로 생성하고 apply 한다.
apiVersion: networking.istio.io/v1beta1
kind: VirtualService
metadata:
  name: scdf
  namespace: default
spec:
  gateways:
  - scdf-gateway
  hosts:
  - '*'
  http:
  - route:
    - destination:
        host: my-release-spring-cloud-dataflow-server
        port:
          number: 8080
배포까지 완료됐으면 이제 브라우저에서 dashboard로 이동해 정상으로 뜨는지 확인한다.
http://localhost/dashboard 로 이동해보자. 이런 페이지가 뜬다면 잘 연결된 것이다.
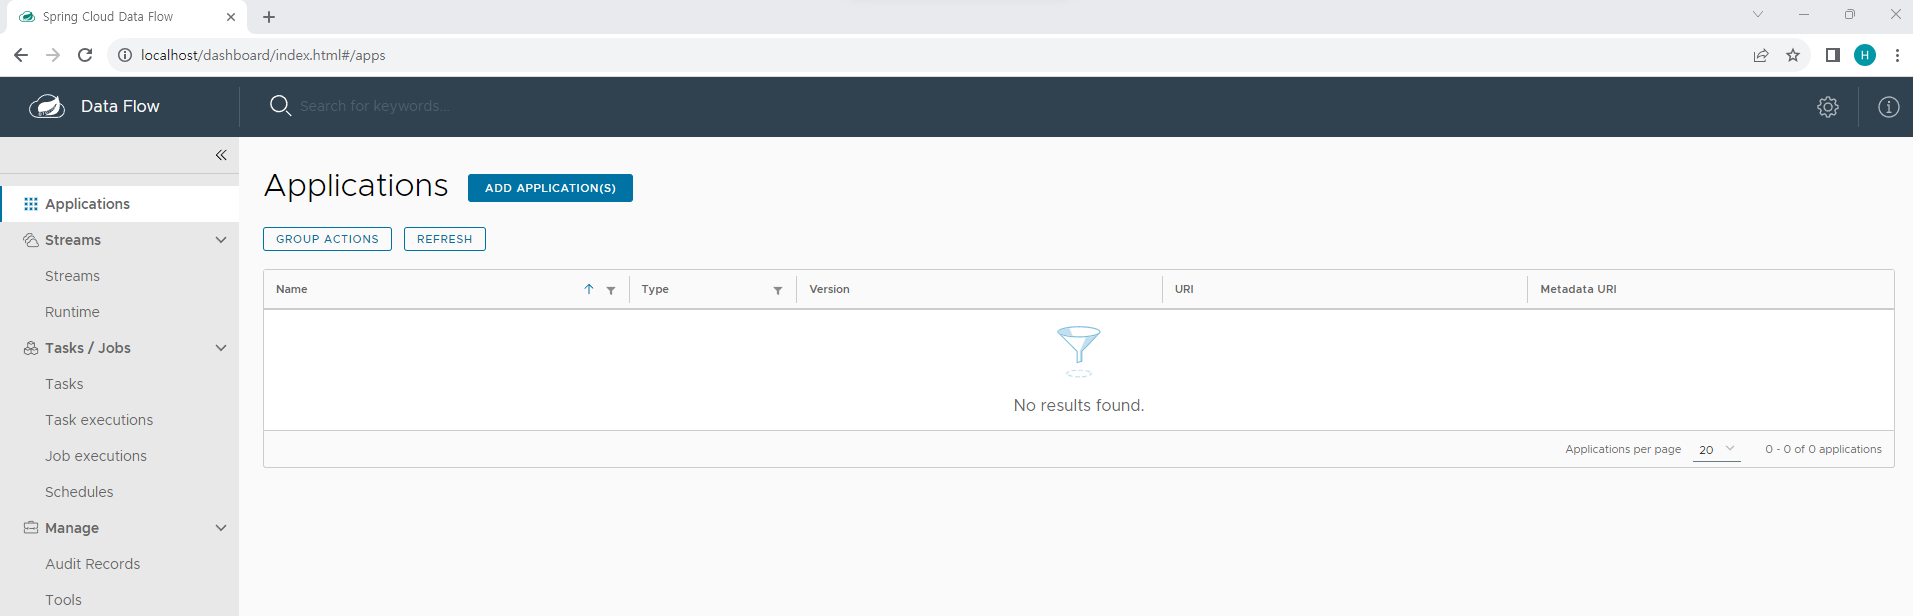
다음으로 2부에서는 스프링부트 어플리케이션을 이미지로 만들어서 scdf에 어플리케이션으로 등록하는 부분가지 정리해보자.
'CloudNative > Orchestration & Management' 카테고리의 다른 글
| Openshift service mesh gatway, virtualservice, serviceEntry (1) | 2024.11.10 |
|---|---|
| Openshift service mesh (istio) (0) | 2024.11.09 |
| metallb (1) | 2024.04.12 |